Fire Sense Outdoor Heater Manual: A Comprehensive Guide
This manual provides essential guidance for safe operation, assembly, and troubleshooting of your Fire Sense patio heater.
Detailed instructions,
safety precautions, and customer support resources are included for optimal performance and longevity of your heating appliance.
Understanding Your Fire Sense Heater
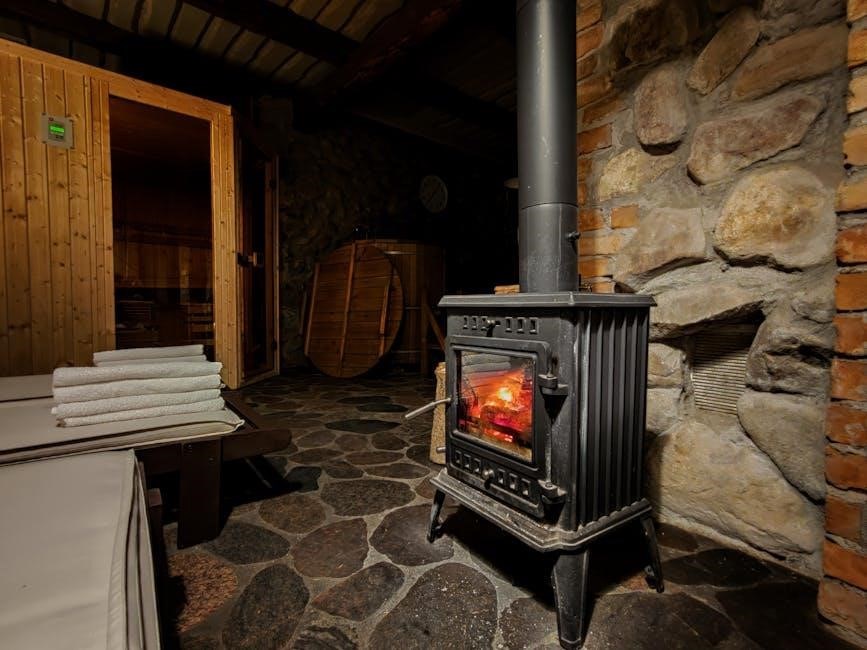
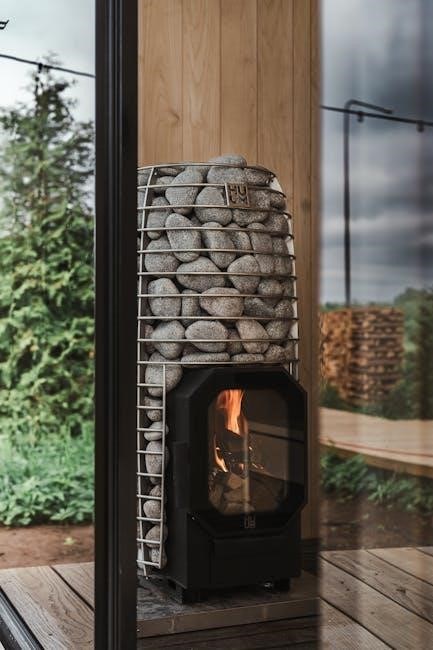
Your Fire Sense outdoor heater is designed to provide supplemental warmth, extending your enjoyment of outdoor spaces during cooler temperatures. These heaters utilize propane gas as a fuel source, converting it into radiant heat. Understanding the heater’s components and operational principles is crucial for safe and efficient use.
Fire Sense heaters come in various models, including tabletop and freestanding units. They feature a burner assembly, a control knob for adjusting heat output, a pilot light for ignition, and a regulator to control gas flow. The heater’s efficiency can be reduced in temperatures below 40°F (5°C). Regular maintenance, including cleaning the burner and checking for blockages, ensures optimal performance. Always refer to the complete owner’s manual for model-specific details and safety guidelines.
Safety Precautions
Prioritize safety when operating your Fire Sense heater. Always use the heater outdoors in a well-ventilated area, avoiding enclosed spaces to prevent carbon monoxide buildup. Keep flammable materials, such as furniture and curtains, at least three feet away from the heater. Never leave the heater unattended while in operation.
Inspect the gas hose for damage before each use, and always perform a leak test with soapy water. Ensure the heater is placed on a stable, level surface to prevent tipping. Children and pets should be supervised around the heater. Familiarize yourself with the overheat protection system and tip-over safety switch. If you smell gas, immediately shut off the gas supply and contact customer service.
Component Identification
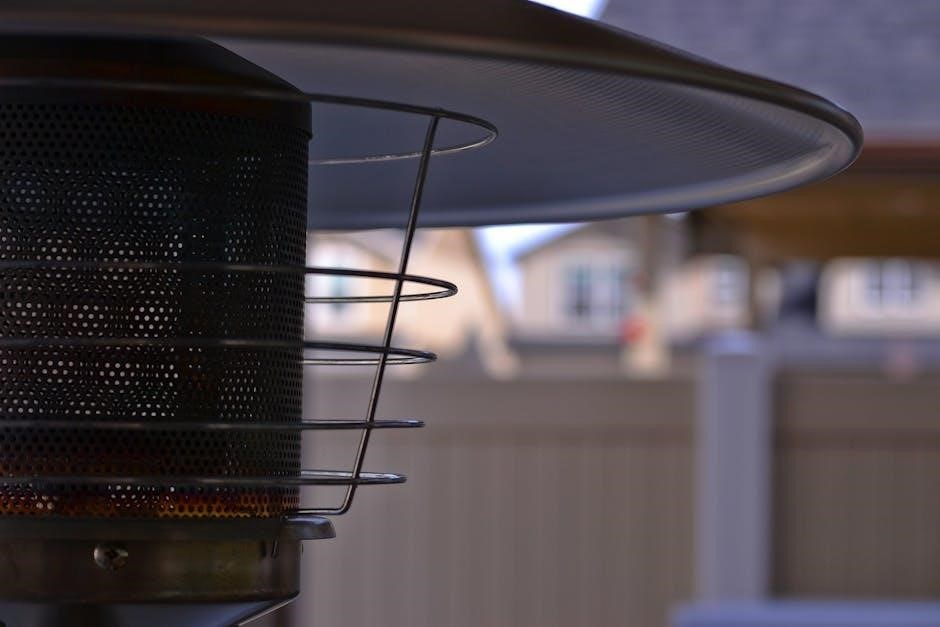
Understanding the parts of your Fire Sense heater is crucial for assembly and maintenance. Key components include the heater housing, burner assembly, regulator, control knob, pilot assembly, spark igniter, and propane tank connection. The regulator controls gas flow, while the control knob adjusts heat settings.
The pilot assembly initiates the flame, and the spark igniter provides the ignition source. Carefully identify the orifice and pilot tube, as these are prone to blockages. Locate the tip-over safety switch and overheat protection system for safety awareness. Refer to the included diagram for a visual representation of each component and their respective locations on your specific Fire Sense model.

Getting Started: Assembly & Initial Use
Proper assembly and initial setup are vital for safe and efficient heater operation. Carefully unpack all components and follow the provided instructions for a secure build.
Unpacking and Assembly Instructions
Begin by carefully unpacking all components from the shipping carton. Verify that all parts listed in the owner’s manual are present. Lay out the components on a protected surface to prevent scratches. Assembly typically involves attaching the heater head to the base, securing the reflector, and connecting the control panel.
Ensure all connections are snug but do not overtighten. Refer to the detailed diagrams in the manual for proper orientation of each part. Pay close attention to the positioning of screws and bolts. A stable base is crucial for safe operation; confirm it is level before proceeding. Incorrect assembly can lead to malfunction or pose a safety hazard, so double-check each step.
Connecting the Propane Tank
Before connecting the propane tank, ensure the heater control knob is in the “OFF” position. Use only a standard 20-pound propane tank with a POL valve connection. Slowly attach the regulator to the propane tank valve, hand-tightening securely. Do not use tools to tighten, as this may damage the connection.
After connecting, it’s vital to perform a leak test (detailed in the next section). Never attempt to connect a damaged or corroded propane tank. Ensure the tank is placed on a level surface, away from any ignition sources. Always disconnect the propane tank when the heater is not in use, or during storage.
Initial Leak Test
After connecting the propane tank, a leak test is crucial for safety. Mix a solution of soapy water (dish soap and water) and apply it liberally to all connections – the regulator-to-tank connection and the hose connections. Slowly open the propane tank valve.
Watch for bubbles forming at any connection point. If bubbles appear, immediately close the tank valve and tighten the connection. Repeat the soapy water test until no leaks are detected. Never use a flame to check for leaks! If you cannot eliminate the leak, disconnect the tank and contact customer service at cservicewelltraveled.net. A gas leak can cause fire or explosion.

Operation: Lighting and Control
Proper lighting and heat adjustment are vital for safe and efficient heater use; Follow the step-by-step instructions carefully, understanding the control knob’s functions for optimal warmth.
Lighting the Heater: Step-by-Step
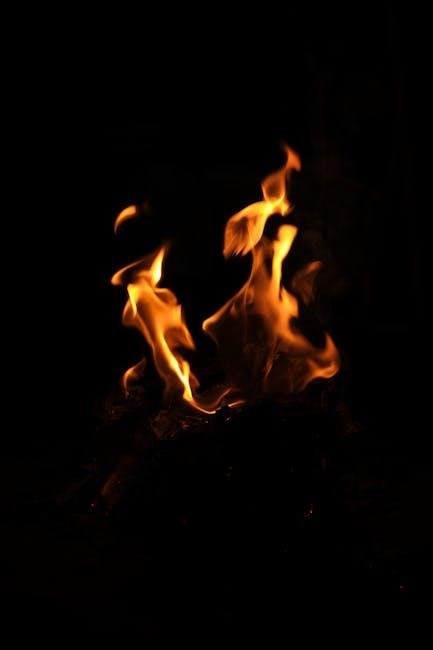
Before attempting to light your Fire Sense heater, ensure the area is well-ventilated and free from flammable materials. First, fully open the propane tank valve. Then, turn the control knob to the “OFF” position. Next, slowly turn the control knob to the “PILOT” setting and depress it for approximately two to three minutes to allow gas to flow to the pilot light.
While holding the knob down, repeatedly press the igniter button until a steady flame appears at the pilot light. If the pilot doesn’t light after several attempts, turn the control knob back to “OFF”, wait five minutes, and repeat the process. Once the pilot is lit, continue holding the control knob down for about 30 seconds. Finally, release the knob and turn it to the “LOW” setting to ignite the main burner. If the burner doesn’t light, repeat the pilot lighting procedure.
Adjusting the Heat Settings
Your Fire Sense patio heater offers adjustable heat settings to customize your comfort level. After successfully lighting the heater, use the control knob to select your desired heat output. Turning the knob clockwise increases the heat, moving from the “LOW” to the “HIGH” setting. Conversely, turning the knob counterclockwise decreases the heat.
The “LOW” setting provides a gentle warmth, ideal for mild evenings, while the “HIGH” setting delivers maximum heat for colder temperatures. Observe the flame height to gauge the heat intensity; a higher flame indicates greater heat output. Remember that the heater may operate at reduced efficiency below 40°F (5°C). Always allow sufficient time for the heater to adjust to the selected setting.
Understanding the Control Knob
The control knob on your Fire Sense heater is central to its operation, managing gas flow and ignition. Typically, it features “OFF,” “PILOT,” “LOW,” and “HIGH” settings. Turning the knob to “OFF” completely shuts off the gas supply. To initiate lighting, turn it to “PILOT” and depress the knob for 2-3 minutes to allow gas to flow to the pilot assembly.
Once the pilot is lit, release the knob and turn it to either “LOW” or “HIGH” to select your desired heat output. Depressing the control knob while adjusting between settings can help maintain a consistent flame. Ensure the knob clicks firmly into each position. Familiarize yourself with these functions for safe and efficient heater use.

Troubleshooting Common Issues
Addressing ignition problems, pilot light failures, and low flame issues is crucial for maintaining your Fire Sense heater.
This section details solutions for common operational challenges.
Pilot Wont Light: Causes and Solutions
If the pilot light fails to ignite, several factors could be responsible. A common issue involves obstructions within the orifice or pilot tube; insects, particularly spiders, frequently build nests, hindering gas flow. Carefully inspect and clear any blockages using a fine wire or compressed air – ensure the heater is off and the gas supply disconnected before doing so.
Low gas pressure is another potential culprit. Verify the propane tank is adequately filled and the valve is fully open. Always check for leaks on the regulator using a soapy water solution; bubbles indicate a potential gas leak requiring immediate attention. Furthermore, remember that heater efficiency diminishes below 40°F (5°C), potentially impacting pilot ignition. If issues persist, contacting Fire Sense customer service at cservicewelltraveled.net is recommended.
Pilot Wont Stay Lit: Diagnosis and Fixes
A pilot light that extinguishes shortly after ignition often indicates a problem with the thermocouple. This component senses the pilot flame and keeps the gas valve open. If it’s faulty, it won’t maintain the gas flow, causing the pilot to go out. Before attempting ignition, ensure all gas has cleared by depressing and holding the control knob for 2-3 minutes.
Turn the knob to the “on” position and fully open the gas line. A worn-out spark igniter can also contribute to this issue, requiring eventual replacement. Low gas pressure can also be a factor, so check your propane tank level. If the problem persists, consult the owner’s manual or contact Fire Sense customer support at cservicewelltraveled;net for further assistance.
Burner Wont Light: Identifying the Problem
If the pilot light is lit, but the main burner fails to ignite, several issues could be present. A common cause is a blockage within the burner ports, preventing gas from reaching the flame. Bugs and spiders frequently build nests inside the venturi tube and burner, obstructing gas flow. Carefully inspect and clean these areas.
Another potential issue is a faulty control knob or a malfunctioning gas valve. Ensure the gas tank is adequately filled and the valve is fully open. Check for leaks on the regulator using soapy water – bubbles indicate a leak. If problems continue, turn off the heater and gas supply and contact Fire Sense customer service at cservicewelltraveled.net for expert guidance.
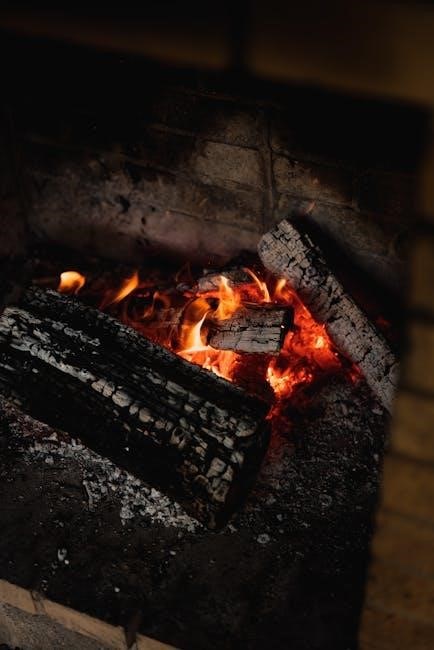
Burner Flame is Low: Potential Reasons
A diminished burner flame can stem from several factors impacting gas supply and burner efficiency. Low gas pressure within the propane tank is a primary suspect; try a fresh, full cylinder. Partially blocked burner ports restrict gas flow, reducing flame intensity – inspect and clear any obstructions.
Additionally, operating the heater below 40°F (5°C) can lead to reduced efficiency, resulting in a smaller flame. Carbon build-up can also contribute to a weak flame; cleaning procedures are outlined in the maintenance section. If the issue persists, verify the regulator is functioning correctly and contact Fire Sense customer service for assistance.
Maintenance & Care
Regular cleaning and inspection are crucial for optimal performance and longevity.
This includes burner cleaning, orifice/pilot tube checks, and regulator leak inspections to ensure safe operation.
Cleaning the Burner
Maintaining a clean burner is essential for efficient and safe heater operation. Over time, debris and carbon buildup can accumulate, hindering proper combustion. Begin by completely turning off the gas supply and allowing the heater to cool down. Carefully remove the burner assembly, consulting your owner’s manual for specific instructions.
Use a soft brush or vacuum with a brush attachment to remove loose particles. For stubborn carbon deposits, a mild solution of soapy water can be used, ensuring the burner is thoroughly rinsed and dried before reassembly. Avoid using abrasive cleaners or tools, as these can damage the burner ports. Inspect the burner ports for any blockages and clear them with a small wire or needle if necessary. A clogged burner can lead to uneven flame distribution and reduced heating efficiency. Reinstall the burner securely, verifying proper alignment before reconnecting the gas supply.
Checking for Blockages in the Orifice & Pilot Tube
A clear orifice and pilot tube are crucial for reliable ignition and consistent flame production. Begin by disconnecting the gas supply and ensuring the heater is completely cool. Carefully locate the orifice and pilot tube, referencing your owner’s manual for precise locations. Use a small wire, compressed air, or a specialized cleaning tool to gently clear any obstructions within the orifice and pilot tube.
Bugs and spiders are common culprits for blockages, so inspect thoroughly. Ensure no debris enters the gas line during cleaning. If using compressed air, wear safety glasses. A blocked orifice restricts gas flow, resulting in a weak or nonexistent flame. A clogged pilot tube prevents the pilot light from igniting. After cleaning, reconnect the components securely and perform a leak test with soapy water before relighting the heater.
Inspecting the Regulator for Leaks
Regularly inspecting the regulator is vital for safe and efficient heater operation. Begin by ensuring the gas supply is turned off. Prepare a solution of soapy water – a mixture of liquid dish soap and water works well. Apply the soapy water liberally to all connections on the regulator, including where it connects to the propane tank and the heater itself.
Watch closely for bubbles; even small bubbles indicate a gas leak. If leaks are detected, immediately turn off the gas supply and tighten the connections. If tightening doesn’t resolve the issue, the regulator may be damaged and require replacement. Never attempt to repair a damaged regulator; contact Fire Sense customer service or a qualified technician. A faulty regulator can lead to dangerous gas leaks and fire hazards.
Advanced Troubleshooting
Addressing complex issues requires careful diagnosis. This section covers low gas pressure, spark igniter malfunctions, and carbon build-up cleaning procedures for optimal heater function.
Low Gas Pressure: What to Do
Experiencing low gas pressure can significantly impact your Fire Sense heater’s performance, resulting in a weak flame or difficulty igniting. First, always ensure the propane tank is not empty and that the valve is fully open. If the tank is full, try a different propane tank to rule out a tank-specific issue.
Next, carefully check for leaks on the regulator using a soapy water solution – bubbles indicate a leak. If leaks are detected, tighten connections or replace the regulator. If the problem persists, turn the cylinder valve OFF and replace the cylinder.
Inspect the hose connecting the tank to the heater for kinks or damage, as these can restrict gas flow. A blocked orifice or pilot tube can also mimic low pressure symptoms; refer to the maintenance section for cleaning instructions. Remember to always prioritize safety and disconnect the gas supply before performing any inspection or repair.
Spark Igniter Malfunction: Replacement or Repair
A malfunctioning spark igniter is a common issue with Fire Sense patio heaters, often preventing initial ignition. Over time, the igniter can become worn out or accumulate debris, hindering its ability to create a spark. First, visually inspect the igniter for any physical damage or corrosion.
Attempt to clean the igniter with a soft brush to remove any accumulated dirt or debris. If cleaning doesn’t resolve the issue, the igniter may require replacement. Replacement igniters are available through Fire Sense customer service or authorized retailers.
Before replacing, ensure the gas supply is completely shut off. Carefully disconnect the old igniter and connect the new one, following the instructions in the assembly section. If you are uncomfortable performing this repair, contact a qualified technician. A faulty igniter poses a safety risk and should be addressed promptly.
Carbon Build-Up: Cleaning Procedures
Carbon build-up within the burner and venturi tube can cause inefficient combustion and produce thick black smoke. Regular cleaning is crucial for maintaining optimal heater performance and preventing potential hazards. Begin by ensuring the heater is completely cool and the gas supply is disconnected.
Carefully disassemble the burner assembly, following the instructions in the ‘Component Identification’ section. Use a soft brush or vacuum to remove loose carbon deposits from the burner ports and venturi tube. For stubborn build-up, a specialized burner cleaner can be used, following the manufacturer’s instructions carefully.
Ensure the burner ports are clear of obstructions before reassembling. Inspect the orifice for any blockages and clean it with a fine wire if necessary. Proper ventilation is essential during cleaning. Reassemble the burner and test the heater to confirm proper operation.
Safety Features & Warnings
Your Fire Sense heater incorporates overheat protection and a tip-over safety switch for secure operation.
Always maintain carbon monoxide awareness and follow all safety guidelines provided within this manual.
Overheat Protection System
The Fire Sense outdoor heater is equipped with a sophisticated overheat protection system designed to automatically shut off the unit if excessively high temperatures are detected. This crucial safety feature prevents potential hazards and ensures the longevity of your heater. The system continuously monitors the internal temperature, and if it exceeds a pre-set limit, the gas supply to the burner is immediately halted.
This prevents overheating, reducing the risk of fire or damage to the heater components. It’s important to note that repeated activation of the overheat protection system may indicate an underlying issue, such as restricted airflow or a malfunctioning component. If this occurs, discontinue use and contact Fire Sense customer service for assistance. Regularly inspect the heater for any obstructions that could impede airflow and compromise the effectiveness of this vital safety mechanism.
Tip-Over Safety Switch
Your Fire Sense patio heater incorporates a crucial tip-over safety switch, a vital feature designed to automatically shut off the gas supply if the heater is accidentally knocked over or becomes unstable. This prevents potential gas leaks and minimizes the risk of fire or injury. The switch is a sensitive mechanism that detects any significant tilting of the unit.
Upon detecting a tip-over, the switch immediately cuts off the gas flow to the burner, ensuring a safe shutdown. It is essential to ensure the heater is placed on a level and stable surface before operation. Regularly inspect the switch for proper functionality; if the heater doesn’t ignite after righting it, the switch may need inspection. Do not attempt to bypass or disable this safety feature under any circumstances.
Carbon Monoxide Awareness
Carbon monoxide (CO) is a colorless, odorless, and poisonous gas produced by the incomplete combustion of fuels like propane. Using a Fire Sense patio heater generates CO, making awareness and prevention critical for safe operation. Never operate this heater inside a home, garage, tent, or any enclosed space; it is designed for outdoor use only.
Ensure adequate ventilation when using the heater outdoors; Symptoms of CO poisoning include headache, dizziness, weakness, nausea, vomiting, chest pain, and confusion. If anyone experiences these symptoms, immediately move them to fresh air and seek medical attention. Consider installing CO detectors in your home as an added safety measure. Regular maintenance, as outlined in this manual, helps ensure complete combustion and minimizes CO production.
Customer Support & Resources
For assistance with your Fire Sense heater, contact customer service at cservicewelltraveled.net. Replacement parts and comprehensive warranty details are also readily available online.
Contacting Fire Sense Customer Service (cservicewelltraveled.net)
Need help with your Fire Sense outdoor heater? The dedicated customer support team is available to assist with any questions, concerns, or troubleshooting you may encounter. Reach out directly via email at cservicewelltraveled.net for prompt and personalized support. When contacting customer service, please have your heater’s model number and date of purchase readily available. This information will help them quickly diagnose your issue and provide the most effective solution.
Be prepared to describe the problem in detail, including any error messages or unusual behavior you’ve observed. The team can guide you through troubleshooting steps, offer advice on maintenance, or assist with warranty claims if applicable. Don’t hesitate to contact them – they are committed to ensuring your satisfaction with your Fire Sense product and a warm, enjoyable outdoor experience.
Finding Replacement Parts
Maintaining your Fire Sense heater ensures years of reliable performance, and sometimes, replacement parts are necessary. While specific part availability may vary, contacting Fire Sense customer service at cservicewelltraveled.net is the best first step. They can advise on compatible parts for your specific model number.
Common replacement parts include the igniter, regulator, burner, and orifice. When requesting parts, providing the model number is crucial for accurate ordering. Online retailers specializing in outdoor heating components may also carry Fire Sense replacement parts. Always ensure the part is specifically designed for your heater model to guarantee proper fit and function. Prioritize genuine Fire Sense parts for optimal safety and performance, avoiding generic alternatives.
Warranty Information
Your Fire Sense outdoor heater is covered by a limited warranty against manufacturing defects. The warranty period typically begins from the date of original purchase. Retain your proof of purchase, as it’s required for any warranty claim. The warranty covers defects in materials and workmanship under normal use.
However, the warranty does not cover damage resulting from misuse, improper maintenance, accidental damage, or normal wear and tear. To initiate a warranty claim, contact Fire Sense customer service at cservicewelltraveled.net. Be prepared to provide your model number, purchase date, and a detailed description of the defect. Warranty service options may include repair or replacement of the defective part.